New BasilWeb Salary Increase!

Imagine my surprise when I woke up one morning and saw I was getting a raise! Upon further inspection, it was for all my employees at BasilWeb. Oh. Wait. I have no employees. Boo.
Nice try, Satan. Not today.
Imagine my surprise when I woke up one morning and saw I was getting a raise! Upon further inspection, it was for all my employees at BasilWeb. Oh. Wait. I have no employees. Boo.
Nice try, Satan. Not today.
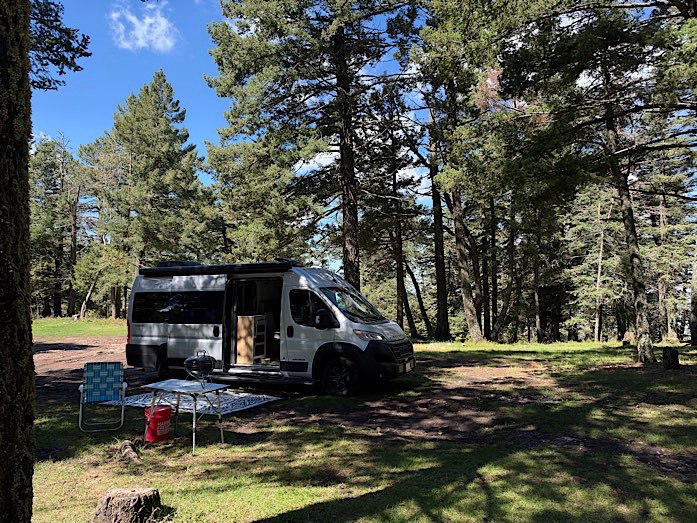
Camping trip 259, or the 2nd real camping trip in Rio Grande, was at Cathy Canyon. It was a spur-of-the-moment decision. The weekend weather looked pretty darned good for in-between 2 rain events.
We weren’t even sure about where we would be, but given the size of our RV, we could fit into a parking space at a trailhead if necessary. Either way, we planned on a hike and an overnight stay up in the Lincoln National Forest near Sunspot, NM. The low was 53 and topped out at 65.
So we loaded up Rio Grande Saturday morning, threw in the girls, and headed up into the mountains. We pulled into the Cathy Canyon parking lot, where the Rim Trail goes through, and less than a 1/4 mile north we found our spot – right along the trail. Was still a little juicy from the week’s rain, but manageable.
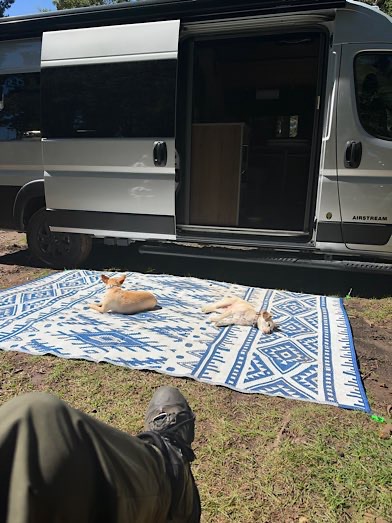
We parked and were totally set up within 15 minutes. Setup now involves throwing down our patio-mat, setting up the lawn chairs and aluminum table, and taking the grill and charcoal out of the cargo hold. 5 minutes later we took the girls out for a 3-mile hike up Rim Trail, then the Cathy Canyon Vista Trail, about a total of 1.5 miles then turned around. We managed about 650 feet of elevation during that time. After all that rain, the forest smelled magnificent.
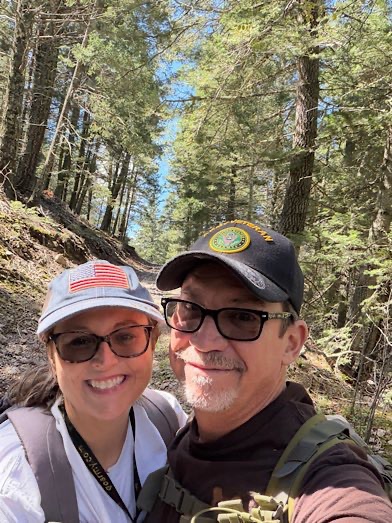
Back at camp I showered (using our new Teakwood shower mat), grilled some wieners, had a campfire and enjoyed some Jack Barrel Proof and a Cohiba. Following that we played a couple games of cribbage (she beat me – twice). Finally, it was time to settle down and read (current book: Dungeon Crawler Carl) before sleeping in to about 7AM.
That’s about it as far camping excitement goes. If you’re interested in the performance of the battery/solar/etc while boondocking, read on, Garth. Let’s see what this “Emerald Off-Grid Status,” the highest tier of eco-friendliest and sustainability certification award can do.
When we arrived at campsite, around 11AM or so, the battery was fully charged, obviously, but I thought this would be a great time to test it out. Nothing but battery and solar for the rest of the day, what would the battery look like tomorrow morning after running the furnace all night, AND brewing a couple cups of coffee through the Keurig, using the on-board battery inverter.
I turned the furnace on around 3PM. Kept it on overnight. The furnace runs off the fuel in the gas tank of the Airstream and provides both coach heat and hot water. If you’ve been following along with me on here, you’ll note that this RV does not use any propane. I set the temp to eventually 72 for both the front and rear areas, which translated to an actual 63-64 degrees in the coach. Excellent temps for sleeping with a good set of covers. We describe this level of great sleep amongst ourselves as “RV Sleep.” As in, “Oh man, I got some good RV Sleep in last night,” even when describing a good night’s sleep at home. I heating system consists of two areas, each with its own variable temperature and fan that can be set to manual if wanted. I kept it on auto.
By sunset, battery was still at 100%. 7:30AM the next day and 2 cups of coffee, the battery was down to 65%. A quick check of the fuel gauge showed no visible drain of gas. Running the generator (which also sucks gas from the tank) for nearly an hour brought it back up to 96% and it quickly charged back up to 100% on the way home. Still no discernible fuel loss from the gauge’s point of view.
One quick note on the fridge. It’s amazing. I’ve had these small refrigerators in the past where the “freezer” is a little box in the top of the fridge and they have never been able to properly freeze a tray of ice. This one actually works. I was able to find a small set of 4 trays that produce regular size ice cubes and a storage tray for cubes already made that fit in the little freezer. Impressive.
I am confident this setup will get us through our annual Big Bend Ranch State Park pilgrimage this winter.
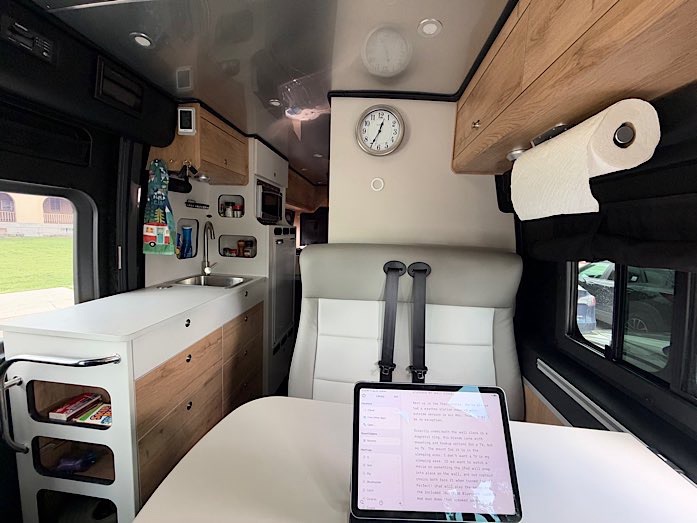
A very cool part of swapping my truck out for Rio Grande the day or two prior to camping is that it becomes my vehicle! Meaning, I have to drive it to work. Unless I use my motorcycle, which ain’t happening during all this rainy weather. No sir.
Which also means I got a little house to retreat to during lunch. To eat. To write. To plan this weekend’s activities. How cool is that?
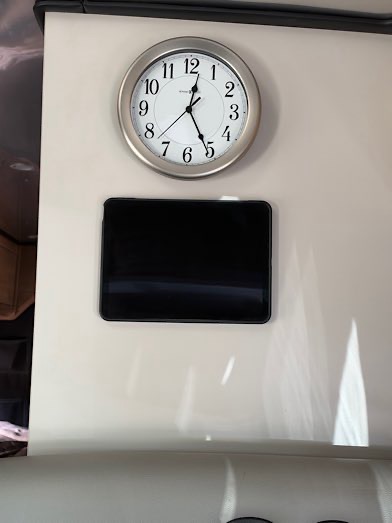
Couple of little mods you can see in this picture. For starters, the Howard Miller wall clock. What RV doesn’t come with a clock? I guess one could argue that everyone has a watch or a phone that tells them the time, but I appreciate time pieces. So yeah. I mounted a standard RV wall clock.
Next up is the Thermometer. We’ve always had a weather station mounted with outside sensors in our RVs. This one will be no exception. Top left, attached to the wooden cabinet.
Directly underneath the wall clock is a magnetic ring. Rio Grande came with mounting and hookup options for a TV, but no TV. The mount for it is in the sleeping area. I don’t want a TV in my sleeping area. If we want to watch a movie or something the iPad will snap into place on the wall, and our captain chairs both face it when turned inward. Perfect! iPad will play the sound over the included JBL Flip6 Bluetooth speaker. And man does that speaker sound good!
To the right above the table window, attached under the cabinet is the paper towel holder.
Finally, in this shot, is a small sponge holder above the sink mounted to the wall.
Slowly but surely we are making this bitch ours! Next up – custom curtains!

My Dad and I, and to some extent, my mother, always had a dark sense of humor. Mine probably dives a bit deeper than theirs, or at least more than they let on.
Parents tend to shield their kids from what society deems inappropriate. The line drawn between what is and is not acceptable moves between generations. My father would say that each passing generation’s behavior gets progressively worse. He would undoubtedly point to the amount of skin shown as an example. How much skin one allows to be viewed by the public today is much more tolerant than it was, say, 80 years ago.
Back to humor, sometimes my parents’ guard would be down and they noticed me noticing. Which brings me to today’s episode. A memory. A memory of when technically, I had surpassed that threshold of parent/child relationship to parent/adult-child relationship.
I was still in my teens. I had flown the nest and joined the Army at this point, but was back home visiting. We decided to hit up a local mall. Remember those? In particular, a store called Spencers. Full of wonderful, humorous gag-gifts.
There was this particular item for sale that resembled a small baseball bat that had been labeled a Bed-Snake Beater. The picture on the packaging had some cartoonish characters with the female walloping a guy’s groin that was covered by the blankets with this Bed-Snake Beater. Mom giggled. I snorted. Then she realized I had caught her giggling and we shared that awkward moment of both of us coming to the realization that I wasn’t a kid anymore, and this shit was pretty funny. Then we both looked at my (younger) sister to see if she noticed. I don’t think she did.
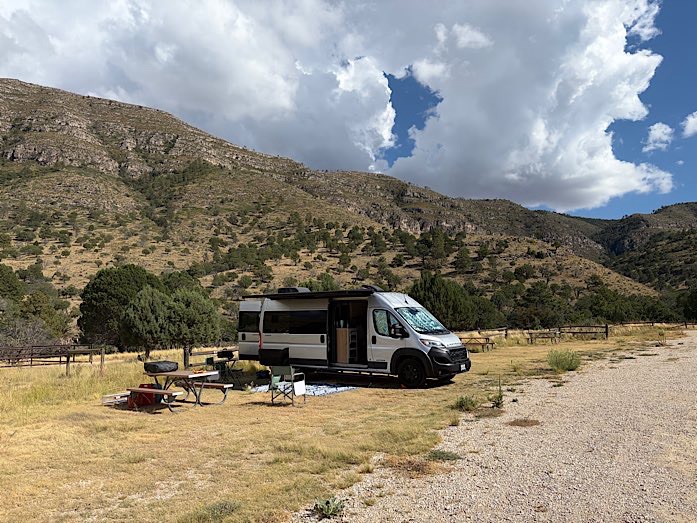
Dog Canyon Campground. The name itself instills a false sense of dread within me due to its similar name to a trail located at Oliver Lee Memorial State Park that winds up the mountains and takes you nearly up to Sunspot. A trail that took me a few times to make it up to the top – Dog Canyon Trail.
But no. This is not that Dog Canyon. This is a remote campground nestled within the north side of Guadalupe Mountains National Park (GMNP). There are two ways to get there. From a trail system beginning at the Pine Springs Campground, located just off Highway 62/80 on your way to Carlsbad Caverns from El Paso, TX. This would be a grueling ~15-mile hike utilizing the Tejas Trail.
The other way to get there is also the only way to get there in a vehicle. While physically 12 miles from the Pine Springs Visitor center, one must drive 102 miles from Pine Springs Visitor Center to reach Dog Canyon Campground, incurring an additional 2 hours of travel time.
Once there, however, you’re greeted by amazing views and weather unlike whatever area you left. Trash receptacles and water are available but no hookups of any kind. 9 tent sites and 4 RV sites. Fresh water is available at a couple locations from a spigot. Gray water can be dumped into a large wash-basin sink located next to the tent campground if you can carry it in a bucket. We reserved site RV A.
When we cleared out the Lance, it was as if we were moving out of a house. So much stuff! There was no way it was going to transfer over to the Airstream. We knew this going in. We also kept a list of things we needed along the way that we didn’t pack. We are now working off that list to make sure we have everything needed for a next trip.
No charcoal burning is allowed at any campground in the GMNP so a containerized propane grill was brought along and did the trick. Hot dogs twice and hamburgers once. Along with some potato salad I made a couple days prior to the trip.
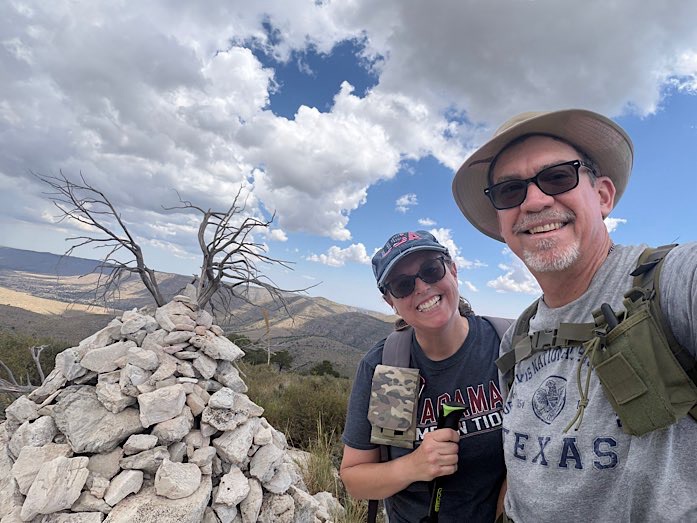
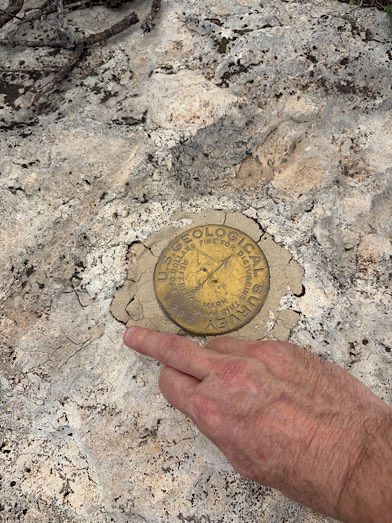
Saturday we hiked the Tejas Trail up to where it falls below Lost Peak, about 3 miles. Once directly under the peak we left the trail and headed up (about another .2 miles), eventually finding the geological survey marker and very large cairn. From the trailhead to the peak was just over 1550 feet of elevation according to my AllTrails app. This was quite satisfying as we had not hiked that high in a couple years. Maybe more.
Sunday was another hike. This time along the Bush Mountain Trail. This one was only about 5 miles out and back and around 800 feet of elevation.
Monday was our travel day taking us back home. Leaving the site consisted of simply latching the drawers, putting chairs/table inside the van, and securing the gas cans to the cargo rack on the hitch of the van. Was pretty sweet not having to hook up a trailer anymore.
Eagerly awaiting our next adventure. Hopefully one where charcoal is allowed so I can bring the little green egg along.