Posted
on April 24, 2023, 10:01 am,
by Walt,
under FAFI.
Well that didn’t take long. CNN is reporting that Carlson Tucker and Fox News have parted ways. Another case of Fuck Around and Find Out, only a week after having to settle a lawsuit with Dominion or face their emails/texts being made public in what would have been a very humiliating trial for Fox News.
So long Tucker! Don’t let the door hit ya where your good lord split ya! Go spread them lies elsewhere now. Get your own domain and join the other fallen has beens, like Bill O’Reilly. Or better yet, collaborate with Bill and come up with the Twin Zone.
Posted
on April 23, 2023, 6:31 pm,
by Walt,
under RV Life.
Standard waiver of responsibility applies: This is how I did it. I have over 38 years of experience in electronics. Your safety is your responsibility. Always seek professional guidance if you have any questions. Never guess when it comes to your life.
This is part 2 of a 2-part series. Part 1 can be viewed here. It also contains the complete parts listing with links in case you are interested. If you want to jump to the final video of the install completed, you can see it right here.
To recap my purpose, I am not installing this to be able to charge my trailer as I am traveling. I don’t have an issue with that. Between the existing truck power and solar panels, I usually get at least a 7 amp charge that basically keeps the battery topped off. If battery is not topped off, the solar panels will ensure it is. This charger is designed to be used while driving, so it includes an extra 12 volt input that gets applied when the vehicle key is in the run position. Turn your vehicle off and that 12 volts goes away, turning off the charger. That will keep it from depleting your towing vehicle’s battery to charge the house battery. But that is not how I designed my install.
My purpose of this charger is to provide a high amperage charge to the house battery in the event that I happen to go 3-4 days without good sunshine and I want to be able to have enough power to get me through the night. I can run the truck for 20 minutes and that will be enough. This will eliminate the need to carry around my small generator as a back up that I never use. This provides me peace of mind while not carrying the backup inverter.
This being the case, I have a switch installed inside the trailer that is used to apply that 12 volts to the charger. Plug only the this power plug into the truck, not the regular trailer pigtail, start the truck, and flip that switch inside and the charger will be energized and charging.
Instructions from Renogy, and just really good advice in general, you want your DC to DC charger to be as close to the battery as possible. This is why I chose to install it in the same cubby as the rest of my power components. I am making all my own cables, so before I can cut my wire to no more/no less than needed, I needed to know where the charger would be physically mounted.
First step was to remove all the power. I removed the solar panels and battery from the system. No more power and the physical removal of the battery provides a decent amount of space to work in.
I chose to place it next to my DC to AC Inverter, which required lowering my inverter a little. It was about dead vertical dead center on the cubby wall. I removed and lowered it to where it would provide the charger with the 5 cm of surrounding space required for proper heat dissipation. Now that my location was known, I went ahead and found the route my cable would take from the tongue to the separate components involved. I used the existing trailer pigtail as a guide since the connector on the truck is very near the connector where that pigtail is plugged into. The frame of the tongue is hollow and provides access holes. Perfect.
Power center, battery removed
Power center, battery installed
Back to the power center, I removed the existing battery cables for the terminal and tied some wire to them. I pulled them out from the front/exterior and as I did it pulled that wire through that I tied to them. This will provided me an easy way to fish the new and existing wires back through. Now that I have all the cables running from the battery compartment to the tongue, I was able to cut the wires to the length I needed in order to manufacture a properly sized pigtail.
Before working on the truck-side of this project last weekend, I started off with 50 feet each of red and black wire. After install I only had about 3 feet of red and 2 feet of black left. I used more of the red because of fuse placement. I installed a 100 amp fuse on the truck side and 80 amp fuse on the trailer.
I was sure to place all shrink tubing and connector assemblies on the cables prior to using a torch to solder the stripped ends into their respective plug ends. Terminal lug on the battery side and SBC120 pins on the pigtail side. Now that the cables are complete I started at the point where the cables get fished through from the outside to the inside of the trailer. Kind of the middle point from a construction view point. On the outside I then installed some plastic cable protections around both cables and ran the pigtail end of the cables through the access points of the tongue frame and had it exit just under the propane tank holding area. Mirroring the existing trailer cable.
SBC120 connector holder with dust cap
SBC Connector, dust cap off
Finally, I slid the SBC120 pins into their connector and slide the connector in the housing of the connector holder and secured. I used cable ties to keep the red and black wires together. This newly constructed cable connects directly to the charger as the DC input.
SBC120 connector plugged into truck
Having done this, it was a simple job of connecting the components into the existing system via my bus bars I manufactured when I installed the LiFe BT battery.
I left some lights and the radio on all night so that I’d have less than full battery the next day for proper testing. Battery (200AH) was down to 88% (174AH). Turning the charger on provided a 56 amp charge to the battery. It charged back up to 97% in 20 minutes. At that point the charger reduced the amperage to 30AH, then 20, as it reached full charge. I’m a Happy Camper.
Posted
on April 18, 2023, 6:57 am,
by Walt,
under news.
WTF America?
Jesus Christ. We’ve got two cases where some idiot just fired his weapon without reason, seriously wounding or killing the victims.
First case involved a black teenage boy who knocked at the wrong door – literally. He was provided an address by his mother to pick up his siblings but ended up at the correct house number – wrong street. The old guy who lived there responded by shooting, seriously injuring the child.
Second case was very similar. A car simply was pulling into a driveway in order to turn around. Owner of the house walked out onto his porch and shot, killing one of the occupants.
These two cases don’t fit the criteria of a mass shooting, and are in addition to the fact that there have been more mass shootings than the number of days. Today marks the 108th day of the year, or as those familiar with Julian Dates, today’s date is 23108. According to gunviolencearchive.org, we have had 164 mass shootings this year alone.
How long before we decide to do something about this, other than to say “It’s the person’s fault, not the gun?”
How long before we decide to do something about this, other than to say “It’s the person’s fault, not the gun?” What’s the solution? I don’t know. What I do know is that what we are currently doing is not it. I’m a gun-owner. I’m not about abolishing the right to bear arms, but there has to be something we can do to effectively reduce these tragedies.
Tags: gun violence, mass shooting Comments Off on More Mass Shootings than Number of Days in 2023 So Far.
Posted
on April 16, 2023, 5:35 pm,
by Walt,
under RV Life.
Standard waiver of responsibility applies: This is how I did it. I have over 38 years of experience in electronics. Your safety is your responsibility. Always seek professional guidance if you have any questions. Never guess when it comes to your life. Also, make sure your alternator is able to handle a 60 amp draw in addition to everything else it has to power.
The conundrum: I mainly use solar on our 2015 ½ Lance Model 1995. But what if part of the (solar) system breaks down? Not unheard of. Or, more realistically, what if we have several days in a row with no sun and colder than expected temperatures during the day hours where not only do I have to run my furnace all night, but also during the day? During the day when instead of solar power being used almost solely to charge the battery, it’s now being used to run the furnace AND charge the battery. This will prevent my system from fully charging. A day or two of those types of conditions are no problem for me. But 4 or 5 days in a row? Now I’d start getting worried. Our power will generally go down about 20-25% per night in weather that hits the 20s overnight, with the furnace set at 64.
And that’s why I still drag my little WEN 2000 watt inverter generator whenever we go someplace for more than a couple nights. Backup power. And of course that also means I have to bring gas along too – just in case. Got a great deal on this generator in 2016 I think it was. Back when Amazon’s deal of the day really was something to write home about. Picked it up for around $299. Also.. back when they had next day delivery if you were Prime. Remember that shit? So does Pepperidge Farm.
I am now getting rid of that extra weight with the install of my 60 amp DC to DC battery charger from Renogy. Been planning this system for the last couple years and just started implementing it this year. Mainly because, to do it how I want to do it was going to take some work and patience. Two things I despise. Not really… the real reason is because it just wouldn’t have been practical until we went lithium with our batteries.
Lithium batteries, you see, are capable of handling a huge load when being charged compared to their lead-acid counterparts. Up to 100 amps in most cases. Try that with your lead acid battery. Long Stick Goes Boom, IFYKWIM.
My plan was simple. Use my truck engine as my generator. But that is kind of impractical if I am going to be running my truck for as long as I would be running my generator. Unnecessary wear and tear on the engine and a huge waste of gas. That is why I never implemented this plan before. But now that I have a 200AH Lithium battery, the narrative has changed.
With the common 2000 watt inverter generator, it’ll put a 20 amp charge on the battery. To charge an almost dead 200AH battery will take up to 10 hours with 20 amps. I would never let my battery get down that low, so lets say I wanted to bring my battery from 80% back up to full power. That would take about 2 hours for a 200AH battery to be charged with a 20 amp charge being applied. And that’s assuming you aren’t drawing a huge load in the meantime. That would drop the amps on the battery for charging purposes, prolonging the charge cycle.
Now lets figure in the ability to charge the same battery from 80% to 100% on a 60 amp charge. That would take about 40 minutes under the same conditions. And remember, I don’t need to charge it up to full. In an emergency, I’d need to just be sure to have at least 25% before heading to bed for the night. Now it becomes practical.
My plan is not to charge the RV battery off this charger while driving, but have this as a viable backup plan. While driving the battery is charged via solar and the standard 6-8 amps off the truck via the standard trailer connector. But no sun for 40 days and nights? I’ll just plug in the trailer to the truck and charge it off the 60 amp charger. The problem is that the standard trailer plug is not built to handle 60 amps. Now I have to build a dedicated trailer cable. One that can handle 60 amps of power. This will require some heavy duty wire. And with the length from the truck battery/alternator, we’re talking 4 gauge wire. That’s where this Part 1 comes in.
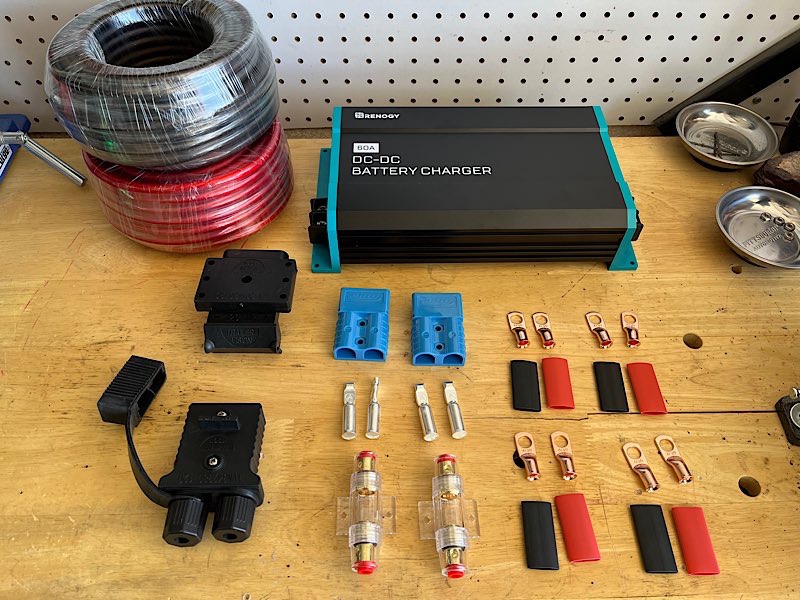
This install will place the DC to DC Charger inside the trailer, as close to the house battery as possible, as suggested by the charger’s manual. The truck side of the install is building an auxiliary cable that will extend from the engine compartment of the truck to the back bumper and terminate in a trailer connector that the trailer will be able to plug into in order to energize the charger. There are 101 ways to do this, and this is what I decided on. There are plenty of brands to choose from, all decent. I chose to stick with Renogy because I use their solar controller, solar panels, battery monitor, LiFe battery, and inverter. In other words, I’m a Renogy whore. Excellent quality. Excellent customer service. They have me for life as a dedicated customer until they do me wrong.
To review my solar and battery equipment, click here. There is a list at the bottom of that article if you don’t want to read the entire thing.
Trailer connector with spring loaded door designed to hold SB120 connectors (truck) – warning… ships from Australia, takes a little more time than usual, and required hand-signed delivery
Other than the charger, conduit, anchors, protective wire wrap, and self-tapping screws, all items were purchased via Amazon. Out of these items, the charger was bought directly from Renogy and the rest from Lowes or Harbor Freight.
Procedure
I used a torch to heat up the wells of the terminal lugs and pin connectors that were secured in a vice while melting rosin-filled solder into the wells prior to inserting the stripped 4 gauge wire into the well. After a few seconds you can let go, and then let it rest a few minutes. Protected the joints with shrink tubing, applying the required heat with a heat gun. Hydraulic crimping will also do the same job, I prefer solder so that if I make any mistake I won’t have to decrease the length of the wire. Simply reheat and pull apart, try again.
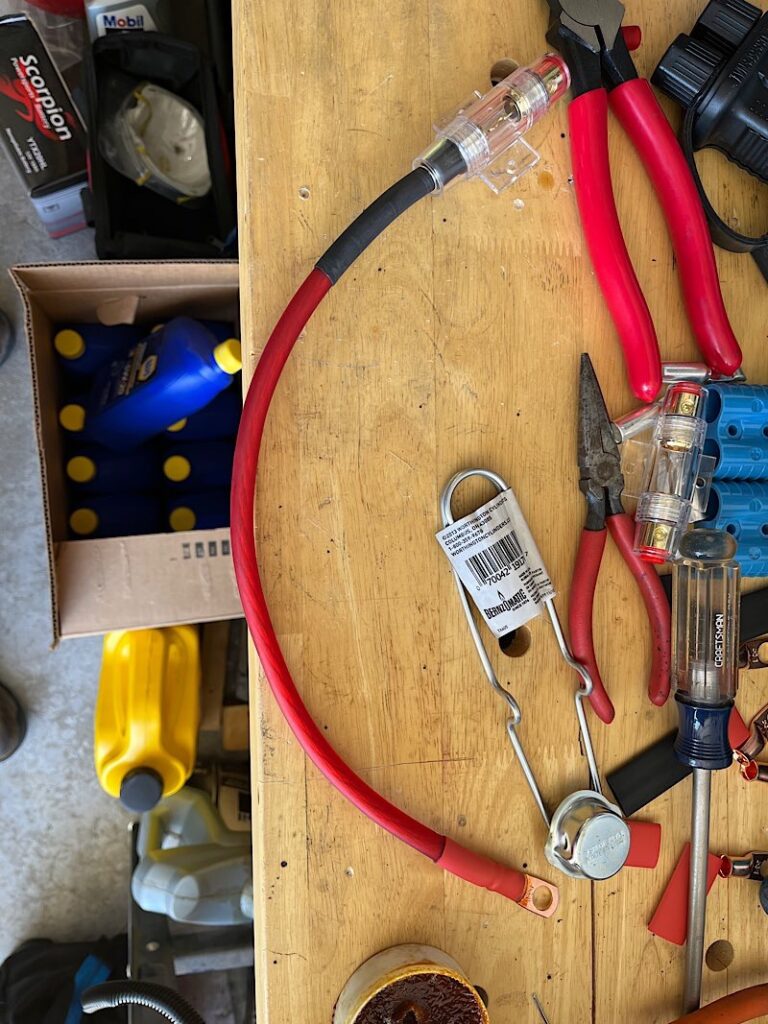
The charger manual suggests a 90 amp (or close) on the starter positive side. I used a 100 amp. The wires are secured into the fuse holder by your standard hex key screw. Again with shrink tubing at these joints. Mount/place the fuse holder in a manner that will protect it from jarring, elements, and heat generated by the engine.
I took my rubber conduit runner, starting from the rear bumper and literally installed it without any wires in it. I found a route that I was happy with that went from the back bumper, to over the spare/under the bed, through the rear driver-side wheel well, back down, and ran it up to the front along the side of the vehicle, avoiding the gas tank and any heat radiating components of the exhaust, up into the engine compartment, running between the battery and the driver side quarter panel. Once installed, I trimmed my comfortable excess – 2 feet worth. Making this entire run about 23 feet. I removed the conduit and headed back to the garage.
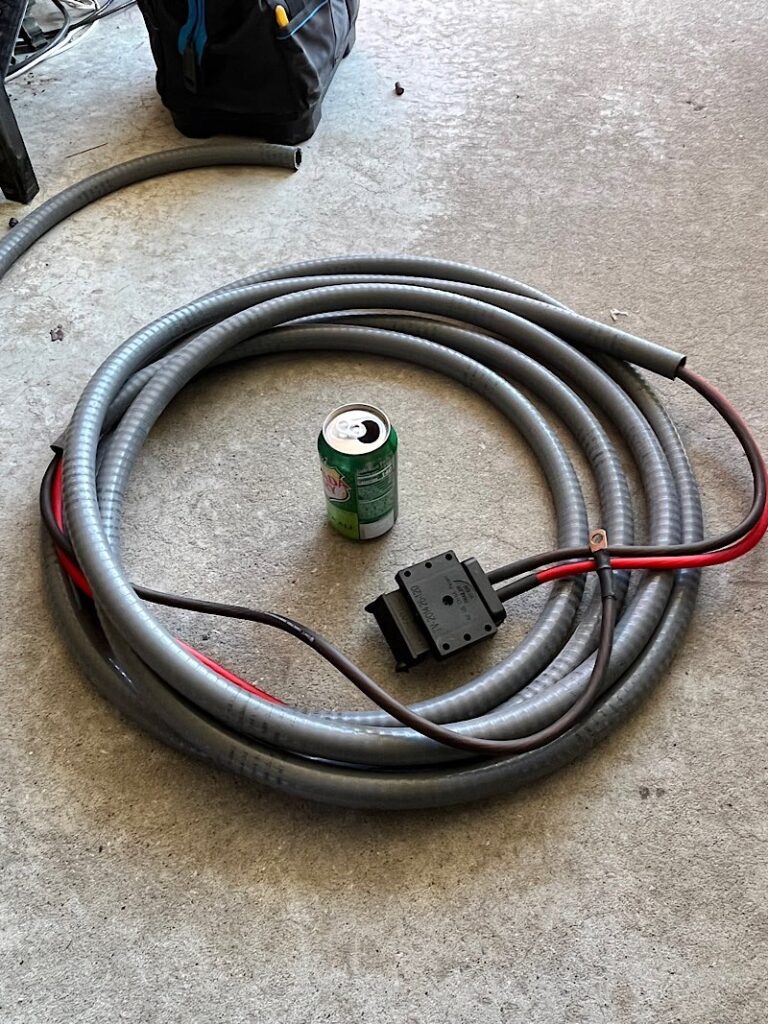
Happy with the length of my conduit, the hard part was fishing two 4-gauge wires through it. As suspected, they weren’t just going to slide through 23 feet of rubber conduit. I heatshrunk a standard air hose to my 50 feet of red wire. The air hose was sturdy enough to push through. Once it peaked out the other end I pulled it through, thereby pulling 23 feet of red wire behind it until the red wire was out. Then I duct-taped the black wire to the other end of the red, and pulled some more. It’s not as easy as it sounds. Hindsight tells me I should have used some super glide or something to assist that would lubricate but wouldn’t facilitate in breaking down the insulation over time. But through brute force at both ends (a pushing assistant) I was able to feed it through. On the engine compartment end I left enough tail to be able to plug into the negative of my battery and the the fuse holder coming off the positive side of the battery. The rear bumper end I left about a foot and a half of tail that would be used to mount the SB120 connector to, which would then be mounted inside the Trailer Vision holder.
Lead cable with fuse holder for coming off the truck battery
Harness build complete
I squirted a bunch of silicone into the back of the trailer connector to protect from splashing water and let it cure overnight. The next day I ran the now filled conduit the same way. Beginning at the back and threading it through the wheel well, along the side, and up into the engine compartment. I used the self-tapping sheet metal screws to secure the conduit to the truck with the anchors. Self-tapping screws again to mount the trailer connector to the underside of the rear bumper. I also places some plastic tubing over the exposed 4-gauge wire for added protection from the elements.
Quite happy with how it turned out. See the video for the finished run from battery to trailer connector. I like to keep my site free from advertisements and tracking, so the link will take you to YouTube. I’m not looking for any thumbs ups or subscriptions. In fact, I’d rather you didn’t.
Posted
on April 13, 2023, 6:26 pm,
by Walt,
under Walt’s Kitchen.
I found this recipe years ago on Robbie’s Recipes. Perfect for when you don’t have a whole lot of time but want some home made pizza. No resting required. Got time and want a thicker crust? Let it rise a half hour or more.
This is the third and final installment (as of now) of my trilogy of pizza crust recipes, along with my deep pan crust and hand tossed recipes.
Dissolve yeast and sugar in water; allow to rest for 8 minutes.
In a separate bowl, combine flour and salt.
Pour yeast mixture over flour mixture and mix well with a heavy spoon.
Turn dough onto a floured surface and knead for 2 minutes.
Working from the edges to the center, press dough into a 12″ circle. We’ve also found that holding the dough up, off the counter and stretching it works well, too (keep rotating the dough circle as you stretch to keep an even circle forming).
Place dough on a lightly greased pizza pan and stretch dough to edges or make on a peel and slide onto a stone
Spread sauce over crust and top with cheese and desired toppings.
Bake in a 500 degree oven for 8-12 minutes, or until edges are golden.
Tags: pizza crust Comments Off on Walt’s Kitchen – Quick-N-Easy Pizza Crust